
Life is an iterative process, and filmmaking at any level is a microcosms of life in general.
My latest example of ‘live and learn’ has been my continued learning with regards to the Insta360 One X. (Previous review here)
I stand by my statement of this system being the best consumer underwater 360 kit currently available in it’s price range
Once you have it in hand though, there are some ways to be thoughtful about shooting with it so that you can capture the best possible imagery.
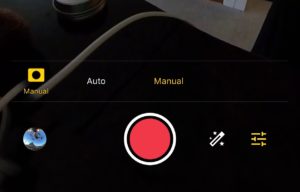 First of learn to shoot with it topside. Learn how to craft your image. (Hmm… shall i start marketing my video production as artisanal?) Even if you’ve never picked up a camera in your life, learn the controls in the system. How to lock down your ISO or White Balance, break away from the crutch that is complete AUTO…
Even the consumer cameras these days have some ability for you to manually control your image. Nothing screams underwater “home movie” like rapid shifts in exposure (how bright or dark your image is and rapid shifting due to auto exposure) or rapid shifts in color due to auto color balance (as seen in my scootering video where the image goes from green to blue-ish tint in rapid sequence)
Figure out how your camera “acts” in the field.
A perfect example of this would be some early tests with the VUZE.camera underwater. That camera has very very aggressive low light compensation, and will automatically shift everything so that the ‘overall image’ maintains appearance of even lighting. The problem is, when you or your camera increases the ISO you also increase the noise (the bad grainy pixelated look in the ‘dark’ areas of your image). So you’d shoot an evening shot and the side with lights would look decent and the other side where there were no lights would try to match the other side and so what i intentionally meant to be the black abyss now looked like a blocky noisy greenish mess. You can see example of some noisy vuze footage here
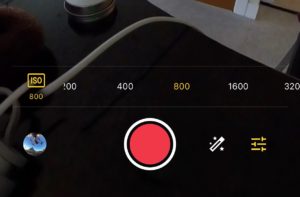
Solution? Lock down the ISO on all the cameras to somewhere in the 800 range (native or near the native ISO of the camera)
Another example is the aforementioned Insta360 One X scootering footage. You see in this where I am doing barrel rolls and the image changes from green to blue to green to blue in rapid succession. This is solved by choosing a single white balance. Don’t worry if you choose the wrong one (sun/fluorescent/outdoor/etc…) you can adjust in post (even rudimentary programs allow some color corrections these days) and this way you won’t be chasing color shifts which are almost impossible to smoothly correct.
Solution? If possible I will lock down my color. If there is no “native” color (like in gopro protunes) I will select “sunny” because that way i have a good idea what the starting ‘temperature’ will be if i need to correct in post. 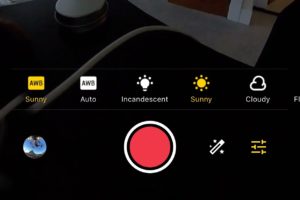
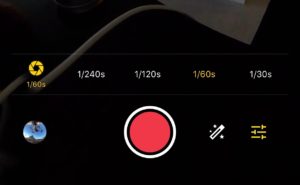
Have you looked at some videos where something just looks ‘off’ and you can’t exactly pinpoint what is up? Some times that can be related to shutter speed. A really good rule of thumb for shooting video is 1/X*2, with X being the frame rate. So if you are shooting in 30fps (the minimum I’d recommend for something going into a headset) as a starting point if you are not desperate for light you’d set your shutter at 1/60. Tip: 1/30 needs less light than 1/60 because the shutter is open for twice as long. The difference will be slightly ‘crisper’ look for the things moving in the shot and slightly less motion blur/cinematic look. We are splitting a bit of difference here, of course we all dream of cinematic ‘look’ in our work but you are working with (at the consumer level) a camera with a small but wide lens and a teeny tiny sensor (this means everything is in focus and inherently very ‘video looking’. These things just don’t align well with that cinematic look just yet. In a bit when we have real light field technology and excellent stereoscopic footage so we can digitally blur the back ground a la iphone portrait mode I’m sure that will change, but we are not there yet.
It may sound a bit nutty that I’m recommending weekend shooters to even try the manual settings for their cheap underwater camera in a cheaper underwater housings (by comparison to the prosumer offerings), but learning the basics of manual control of your camera can improve your footage dramatically. Do you need to do it all the time? At this level, probably not (I do my best to never shoot auto) but once you start and see your improved results you may continue to do so.
You may find that you can get the improved results by only locking down one or two of the settings, and each of them impacts something different in your image. Know what the impacts of setting changes.
If you were to ask me at the consumer level if you only wanted to lock down one setting, I’d probably say to lock down the color so that the footage doesn’t vary when you change what direction you are facing in relation to video or sunlight or what depth you are swimming at.
Happy Shooting and Diving and remember to tune in for my next post! Learn about different ways to position the Insta360 One X in Dive housing on your selfie stick depending on subject matter.